First launch
From installation to the home screen: what Hawser shows at start-up, what the keyboard actually does, and where to find help.
Installing Hawser
Hawser is a native macOS application, distributed through two channels that carry the same software. No feature exists on one side and is missing from the other. Both require macOS 11.0 or later, and both run inside the macOS sandbox.
| Mac App Store / TestFlight | Developer ID-signed DMG | |
|---|---|---|
| Minimum macOS version | 11.0 | 11.0 |
| Sandbox | Enabled | Enabled |
| Updates | Through the App Store. The updater module is compiled out of the binary. | Checked at launch; a ✨ Mise à jour disponible (Update available) panel appears |
| Features | Identical | Identical |
On the DMG channel, when a newer version is published, a panel appears at the bottom of the window at start-up: the heading ✨ Mise à jour disponible, the version number, and two buttons, Plus tard (Later) and Installer (Install). Installer downloads, installs, then restarts the application. Plus tard simply dismisses the panel for the current session.
Hawser is in private beta. On hawser.ilygo.ch, the three download buttons carry a Soon badge and are disabled. To request access, write to hawser@ilygo.ch.
The three first-launch screens
On the very first launch, Hawser does not show the home screen but a sequence of three introductory screens. They are purely informative: no setting is applied, and no question is asked.
Bienvenue dans Hawser(Welcome to Hawser) —Client SSH/SFTP/FTP/Telnet macOS-natif avec coffre chiffré.(a macOS-native SSH/SFTP/FTP/Telnet client with an encrypted vault).Votre coffre(Your vault) —Tout est stocké dans un fichier .ivault chiffré (Argon2id + AES-256-GCM).(everything is stored in an encrypted .ivault file).Touch ID (optionnel)—Activez Touch ID pour déverrouiller votre coffre sans saisir le mot de passe.(turn on Touch ID to unlock your vault without typing the password).
You move through them with Retour (Back) and Suivant (Next), which becomes Terminé (Done) on the third screen. Three pagination dots show your position, and Passer (Skip) leaves at any point. Passer and Terminé do exactly the same thing.
The home screen
The home screen is Hawser's only way in. It stays on screen as long as no vault is open: the title Hawser, and the subtitle Ouvre un coffre chiffré ou crée-en un nouveau. (Open an encrypted vault or create a new one). No vault is opened automatically, even if one exists in the application folder.
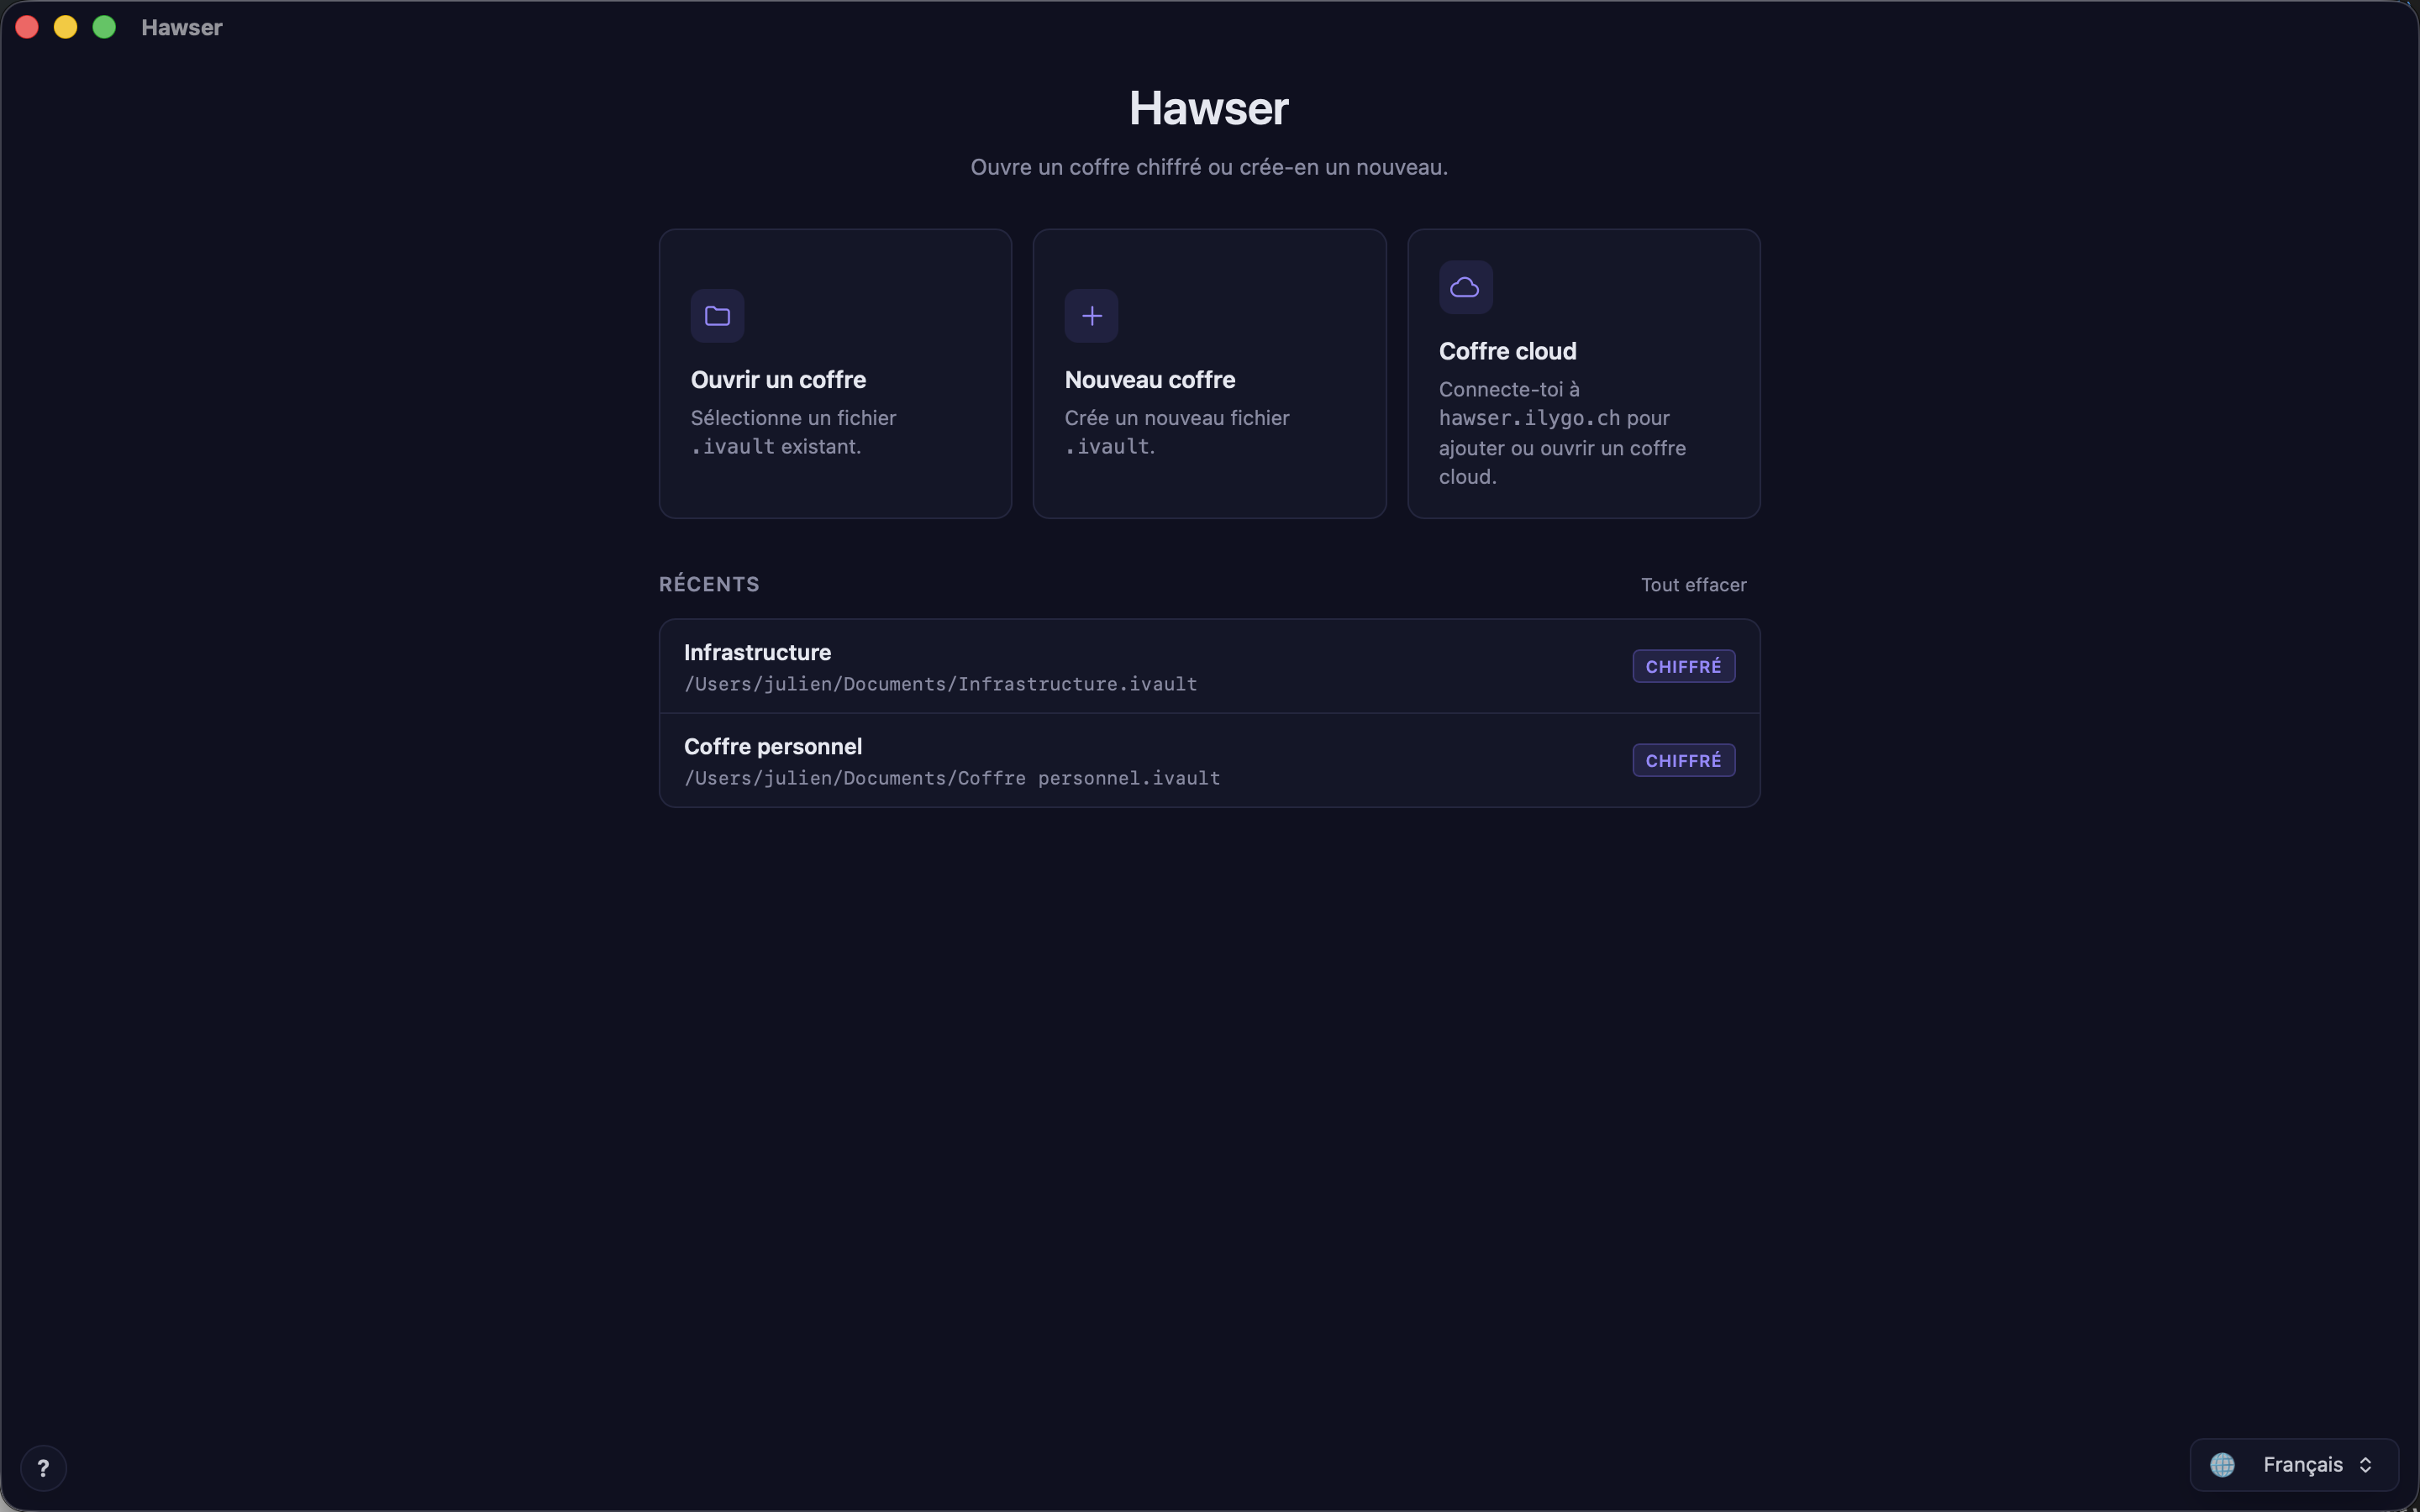
| Card | Text shown | What it opens |
|---|---|---|
Ouvrir un coffre (Open a vault) | Sélectionne un fichier .ivault existant. (Select an existing .ivault file) | The macOS file picker, filtered on ILYGO vault (accepts .ivault and .outpost) |
Nouveau coffre (New vault) | Crée un nouveau fichier .ivault. (Create a new .ivault file) | The save panel, with My Vault.ivault proposed as the name |
Coffre cloud (Cloud vault) | Connecte-toi à hawser.ilygo.ch pour ajouter ou ouvrir un coffre cloud. (Sign in to hawser.ilygo.ch to add or open a cloud vault) | The account flow — see Syncing your vaults |
Below the cards, the Récents (Recent) section lists the last twenty vaults opened, with their name and full path. Each time it is displayed, Hawser re-reads every file header to refresh its badge: chiffré (encrypted), non chiffré (not encrypted) or introuvable (not found — the row is greyed out and no longer clickable). Right-clicking a row is the only way to remove it; it asks for confirmation (Retirer "<nom>" de la liste ? — Remove "<name>" from the list?) and never touches the file on disk. When the list is empty: Aucun fichier récent. Crée-en un ou ouvre un coffre existant. (No recent files. Create one or open an existing vault.)
If the Mac is offline or the server does not answer, an orange banner slots in below the cards and the cloud section disappears. The banner states that cloud sync is unavailable and that local vaults still work normally.
⚠ Pas de connexion réseau — la synchronisation cloud est indisponible. Les coffres locaux fonctionnent normalement.The sidebar and the eight views
Once a vault is unlocked, a Chargement du vault… (Loading vault…) overlay appears, then the main application loads on the Hôtes (Hosts) view. The left sidebar — the rail — carries eight entries, each with its icon and label.
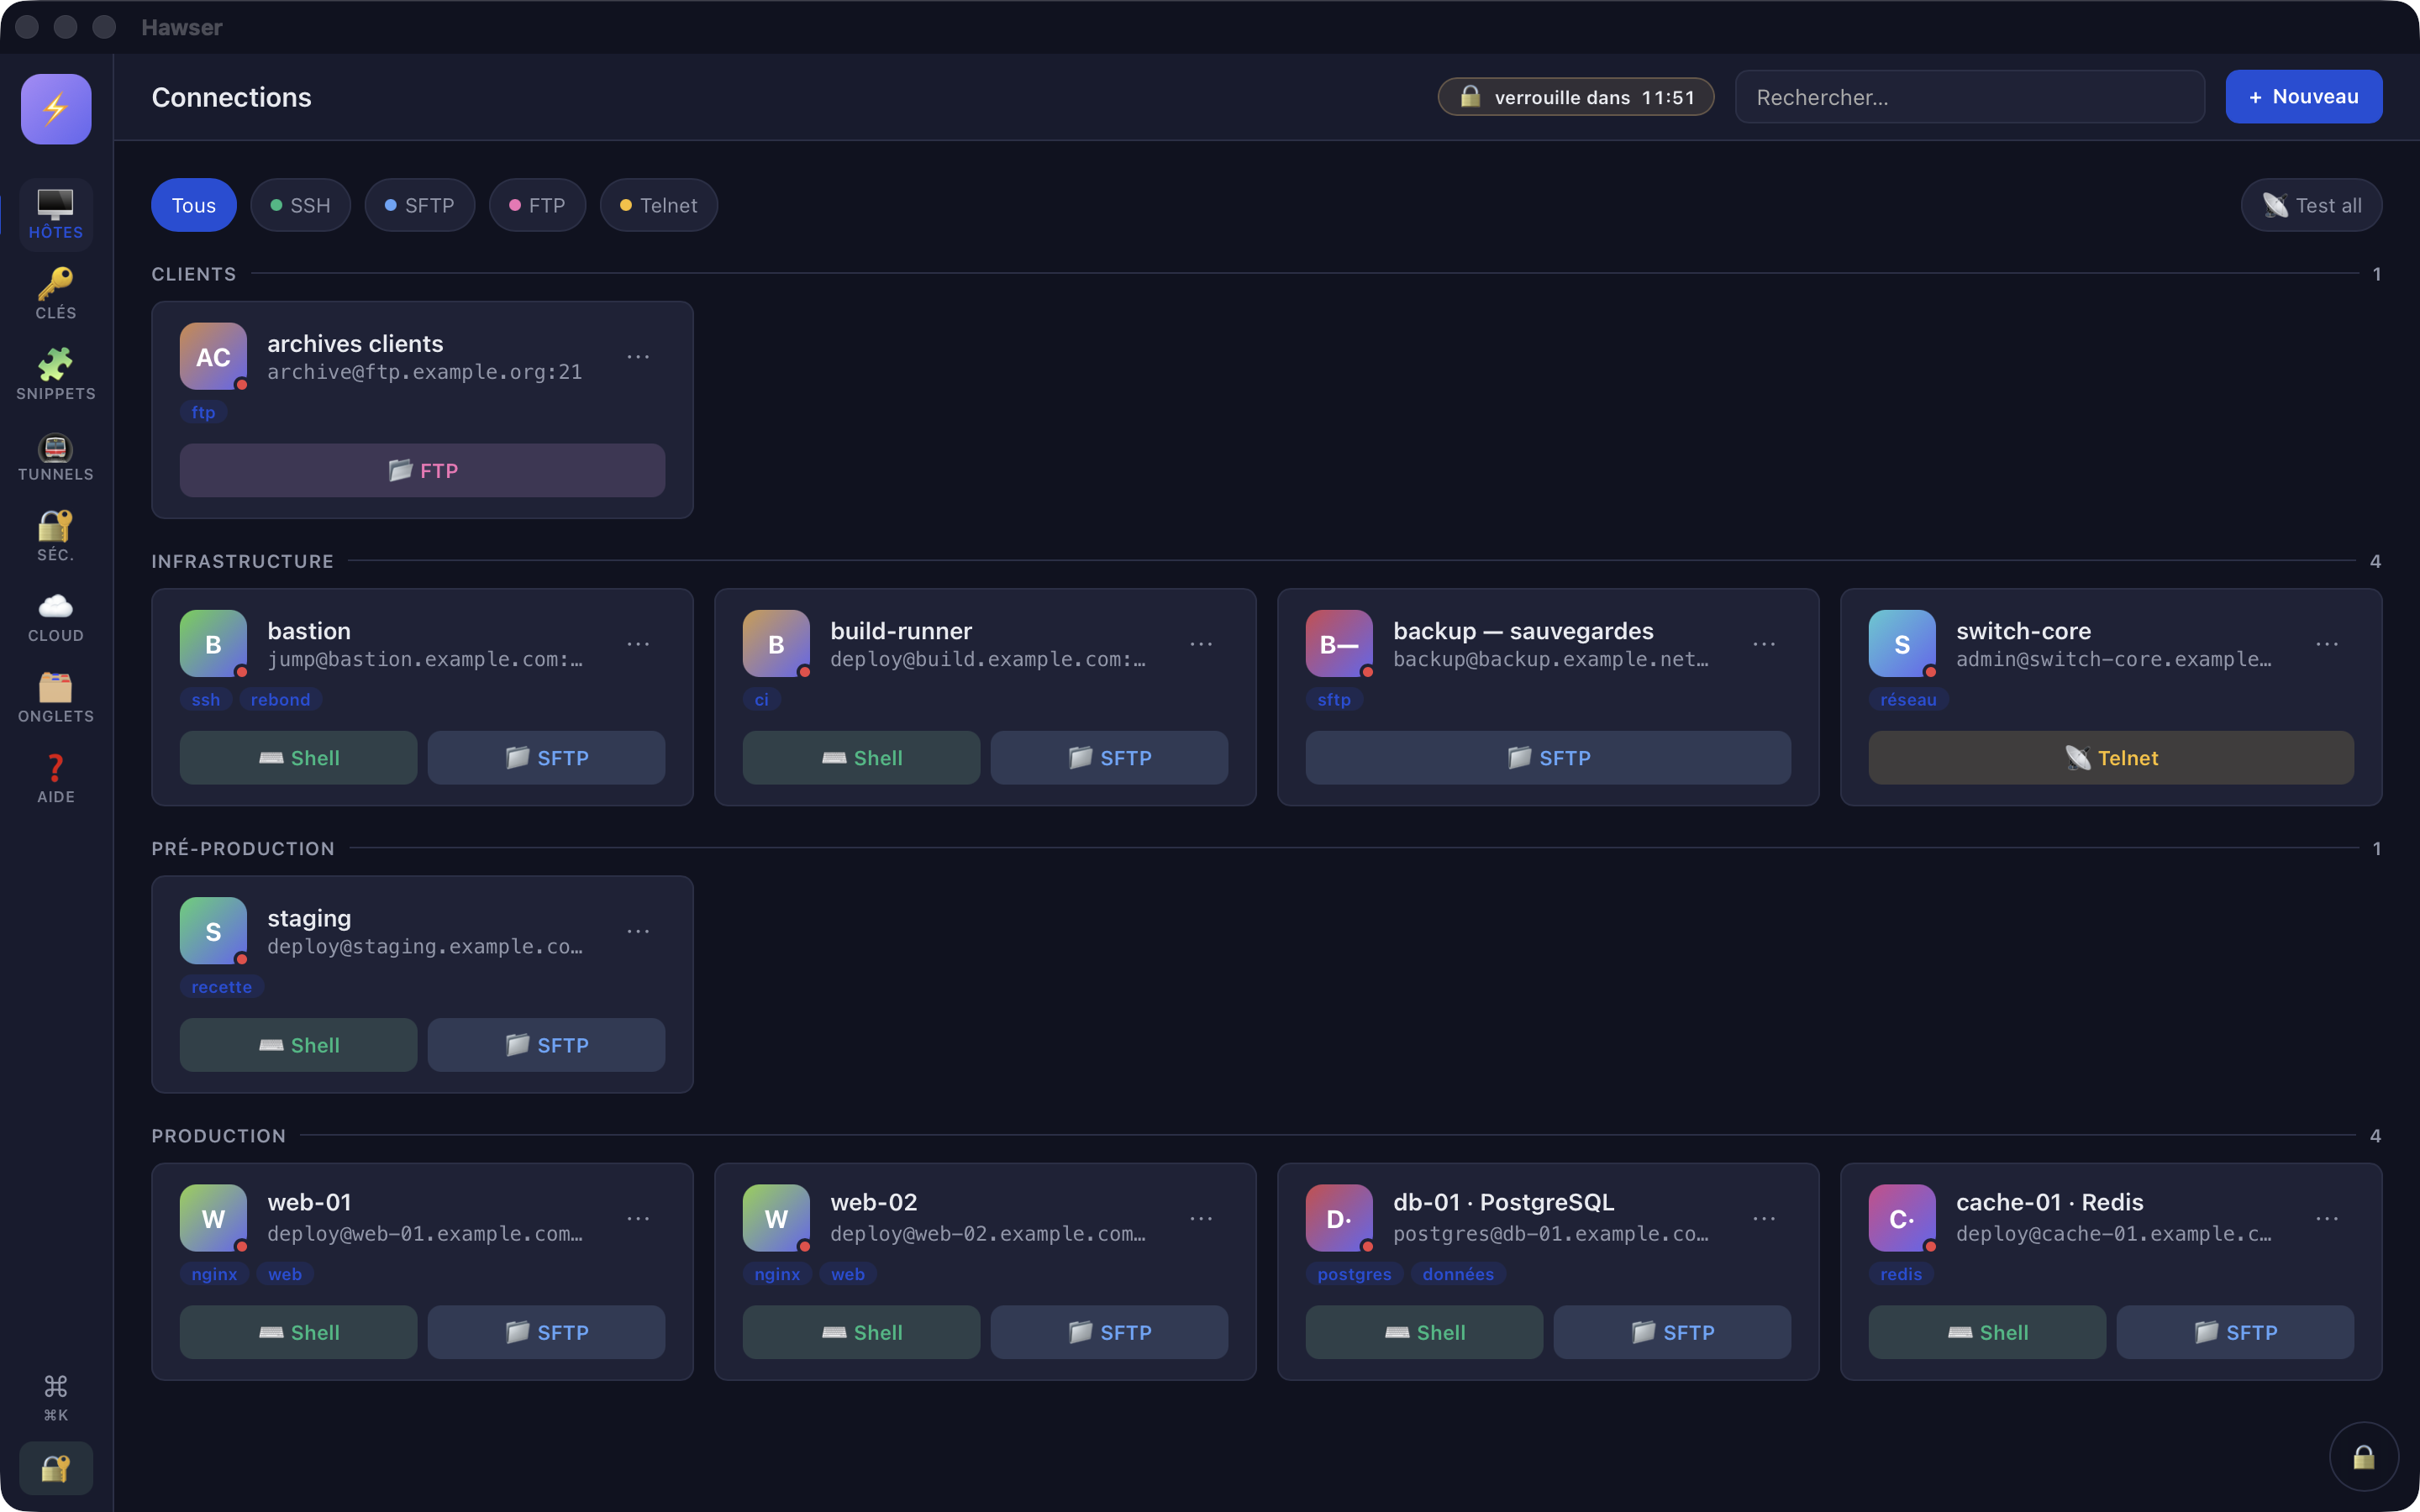
+ New. The search field only appears on Hôtes, Clés and Snippets.| Rail entry | What you find there |
|---|---|
| 🖥️ Hôtes | The saved servers, filterable by protocol — Adding a server |
| 🔑 Clés (Keys) | The vault's SSH keys — Managing SSH keys |
| 🧩 Snippets | Reusable commands — Snippets and inspection |
| 🚇 Tunnels | Port forwarding — Tunnels and ports |
| 🔐 Séc. (Security) | Auto-lock and interface language — What is encrypted |
| ☁️ Compte (Account) | Account and sync — Syncing your vaults |
| 🗂️ Onglets (Tabs) | The open sessions, with a badge showing the number of tabs — Opening an SSH session |
| ❓ Aide (Help) | The built-in help centre (see below) |
Below the eight entries, separated by a gap, a ⌘K button opens the command palette. The 🔐 padlock icon at the very bottom of the rail is purely decorative: it is a reminder that the vault is encrypted, it does not close it. To close the vault, use the round 🔒 button in the small dock at the bottom right of the window, or ⌘L — see Opening and locking.
The ⌘K command palette
⌘K (or Ctrl+K) opens a floating panel at the top of the screen, with a Search hôtes, snippets, actions… field and the full list of what can be triggered. The ⌘K button at the bottom of the rail does the same thing.
- Hosts —
HÔTEbadge, withuser@hoston the right. Confirming switches to the Sessions view and opens the tab matching the protocol. - Snippets —
SNIPPETbadge. Confirming sends the snippet body to the active SSH tab. - Actions —
New connection,New SSH key,New snippet,New tunnel, andTest tous les hôtes(Test all hosts). - Import / export —
Importer config OpenSSH (~/.ssh/config),Importer depuis Termius / Royal TSX / SecureCRT,Exporter en config OpenSSH(import an OpenSSH config, import from Termius / Royal TSX / SecureCRT, export as an OpenSSH config).
Filtering is a plain case-insensitive substring search on the name and the subtitle. ↑ and ↓ move the selection, Entrée (Enter) runs the entry, and a click on the dark backdrop closes the palette without launching anything.
What the keyboard actually does
Hawser's keyboard support is thin. Here is the verified list.
| Shortcut | Effect |
|---|---|
⌘K / Ctrl+K | Opens the command palette |
⌘L / Ctrl+L | Closes the vault and returns to the home screen |
Échap | Closes the frontmost dialogue — see the warning above |
Entrée | Confirms the frontmost dialogue |
Tab / Maj+Tab | Cycles within the open dialogue, without leaving it |
⌘Q / ⌘W | Quits the application, allowing pending writes up to three seconds to reach the disk |
Interface language
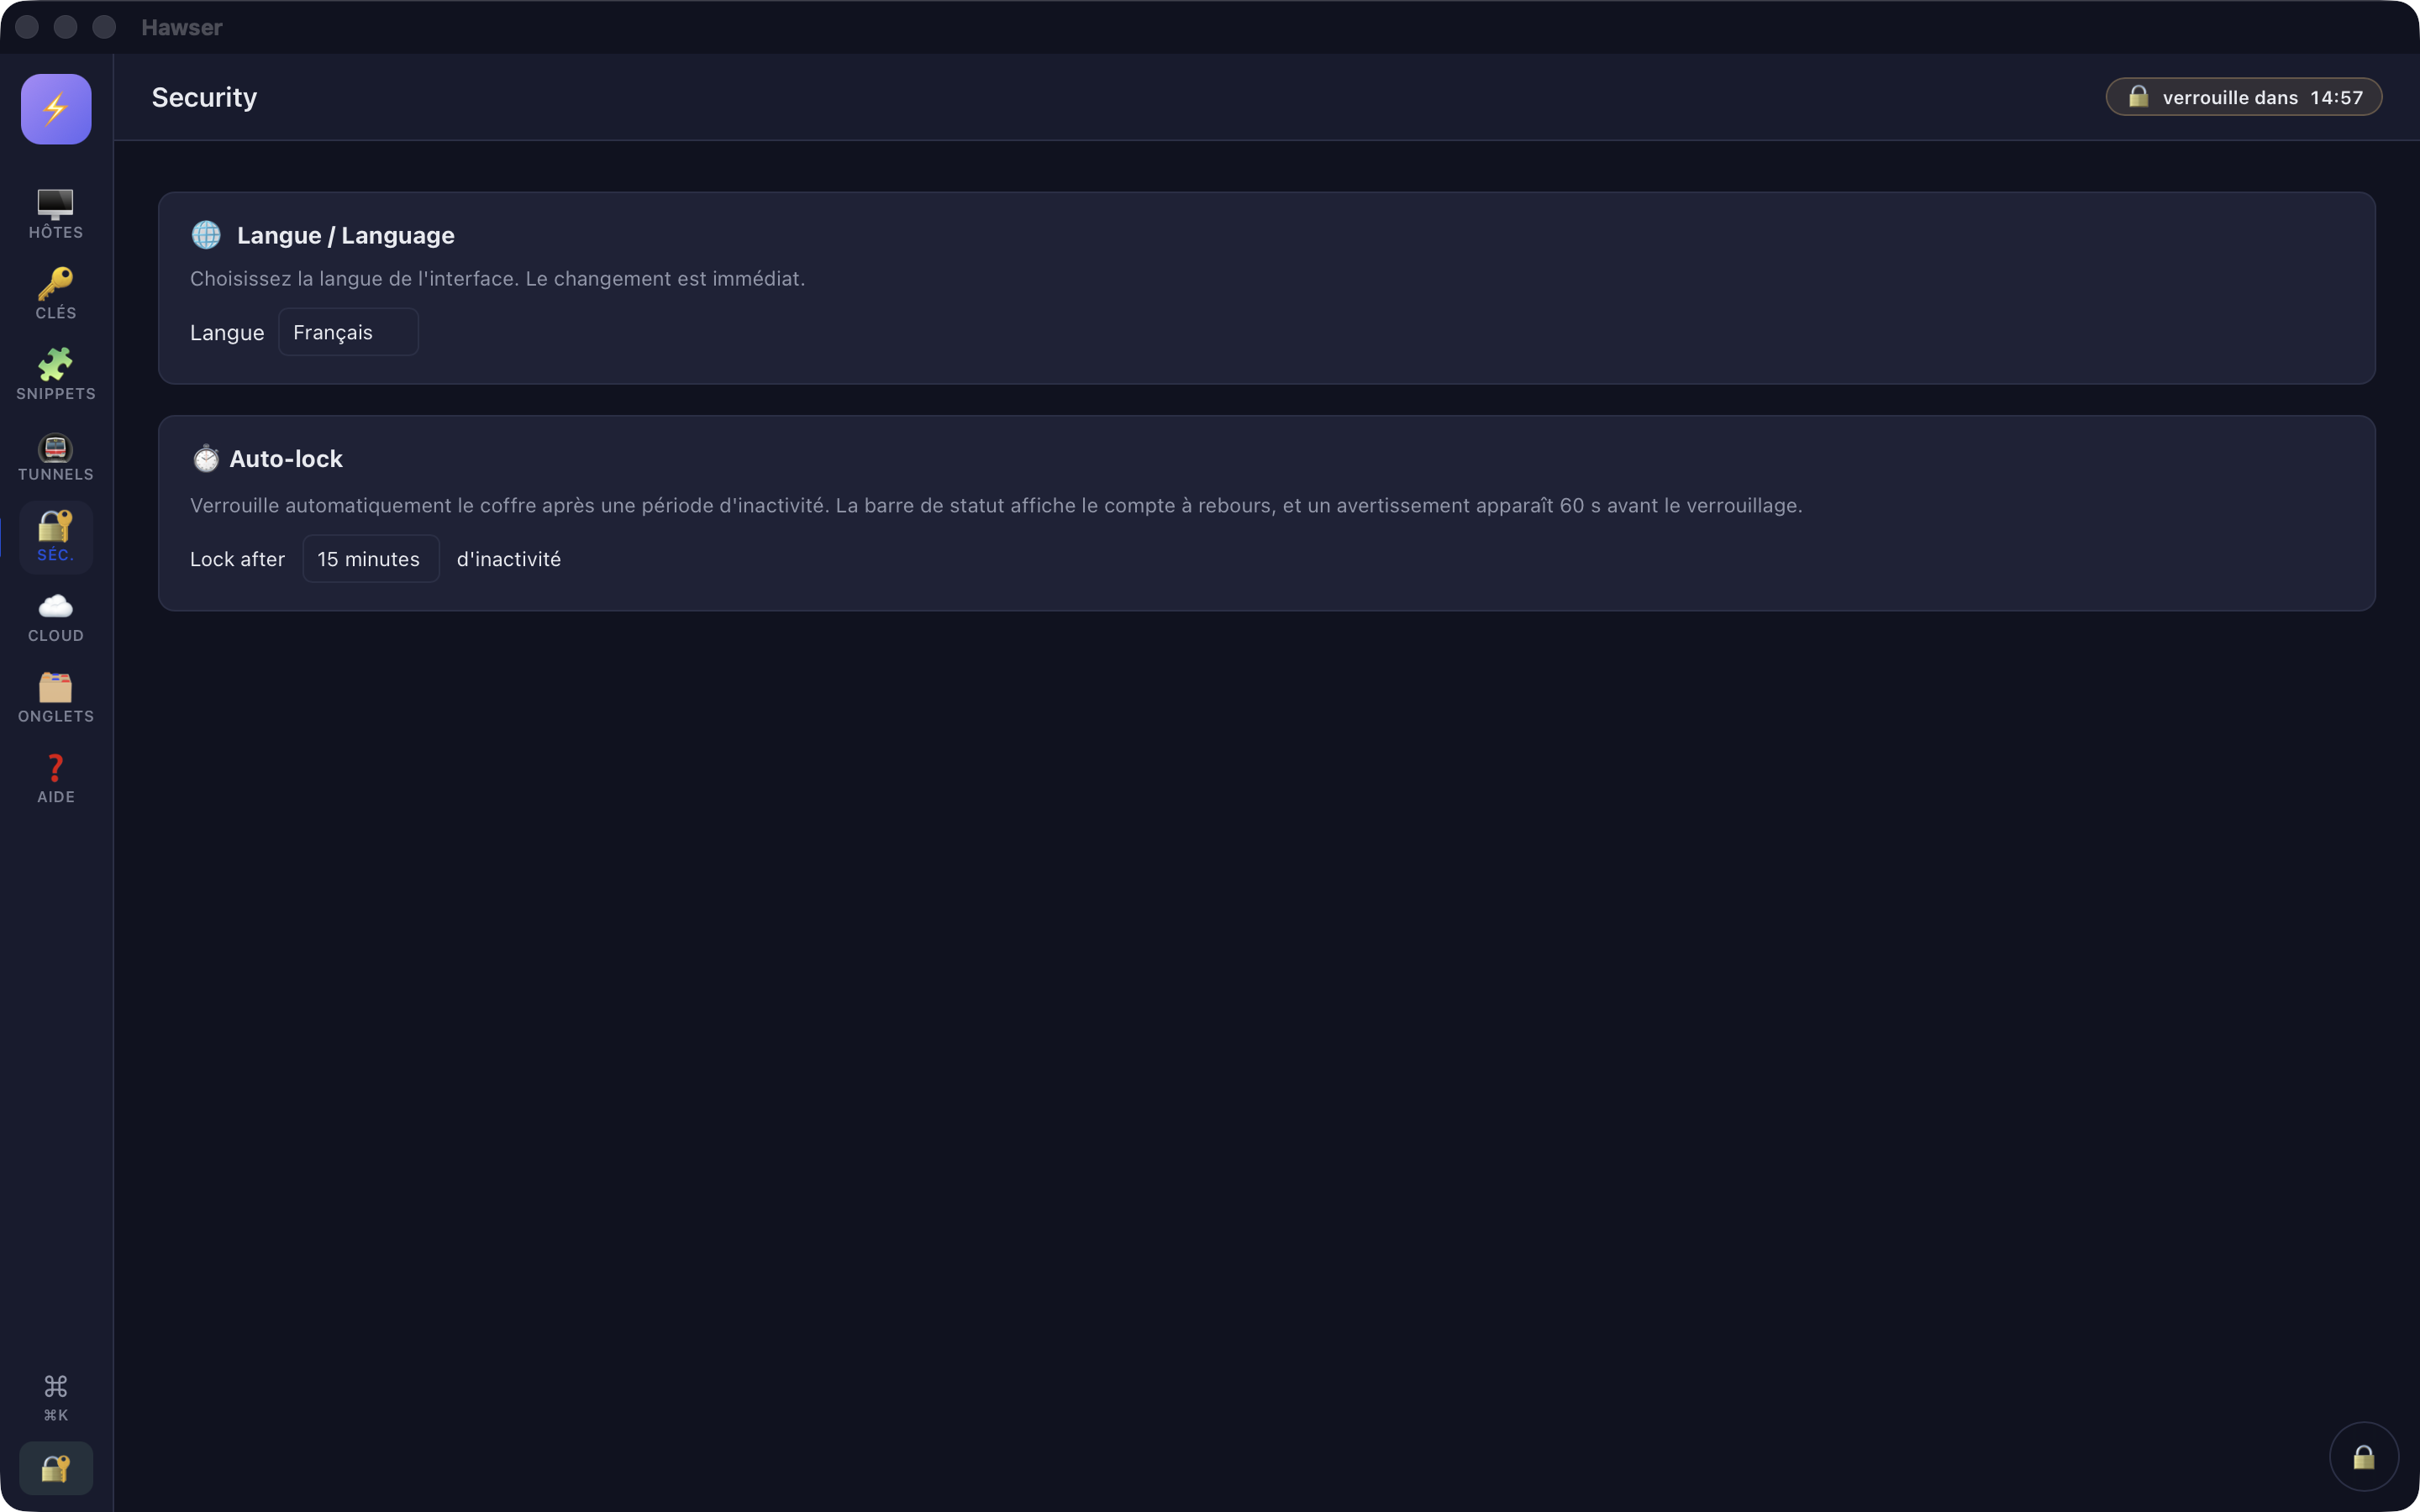
Two languages are available: Français and English. The setting is in the 🔐 Séc. rail entry, section 🌐 Langue / Language, as a drop-down list. The change takes effect immediately, with no reload, and it is remembered for later launches. With no saved preference, Hawser derives the language from the system: French if it starts with fr, English in every other case.
Built-in help
The ❓ Aide rail entry opens the complete manual — the one you are reading — built into the application and readable with no network: same pages, same screenshots, same language as the interface. On the left, the table of contents and a search field; on the right, the page, with On this page to jump to a section, and two buttons: Open in the browser (the online version) and Write to support.
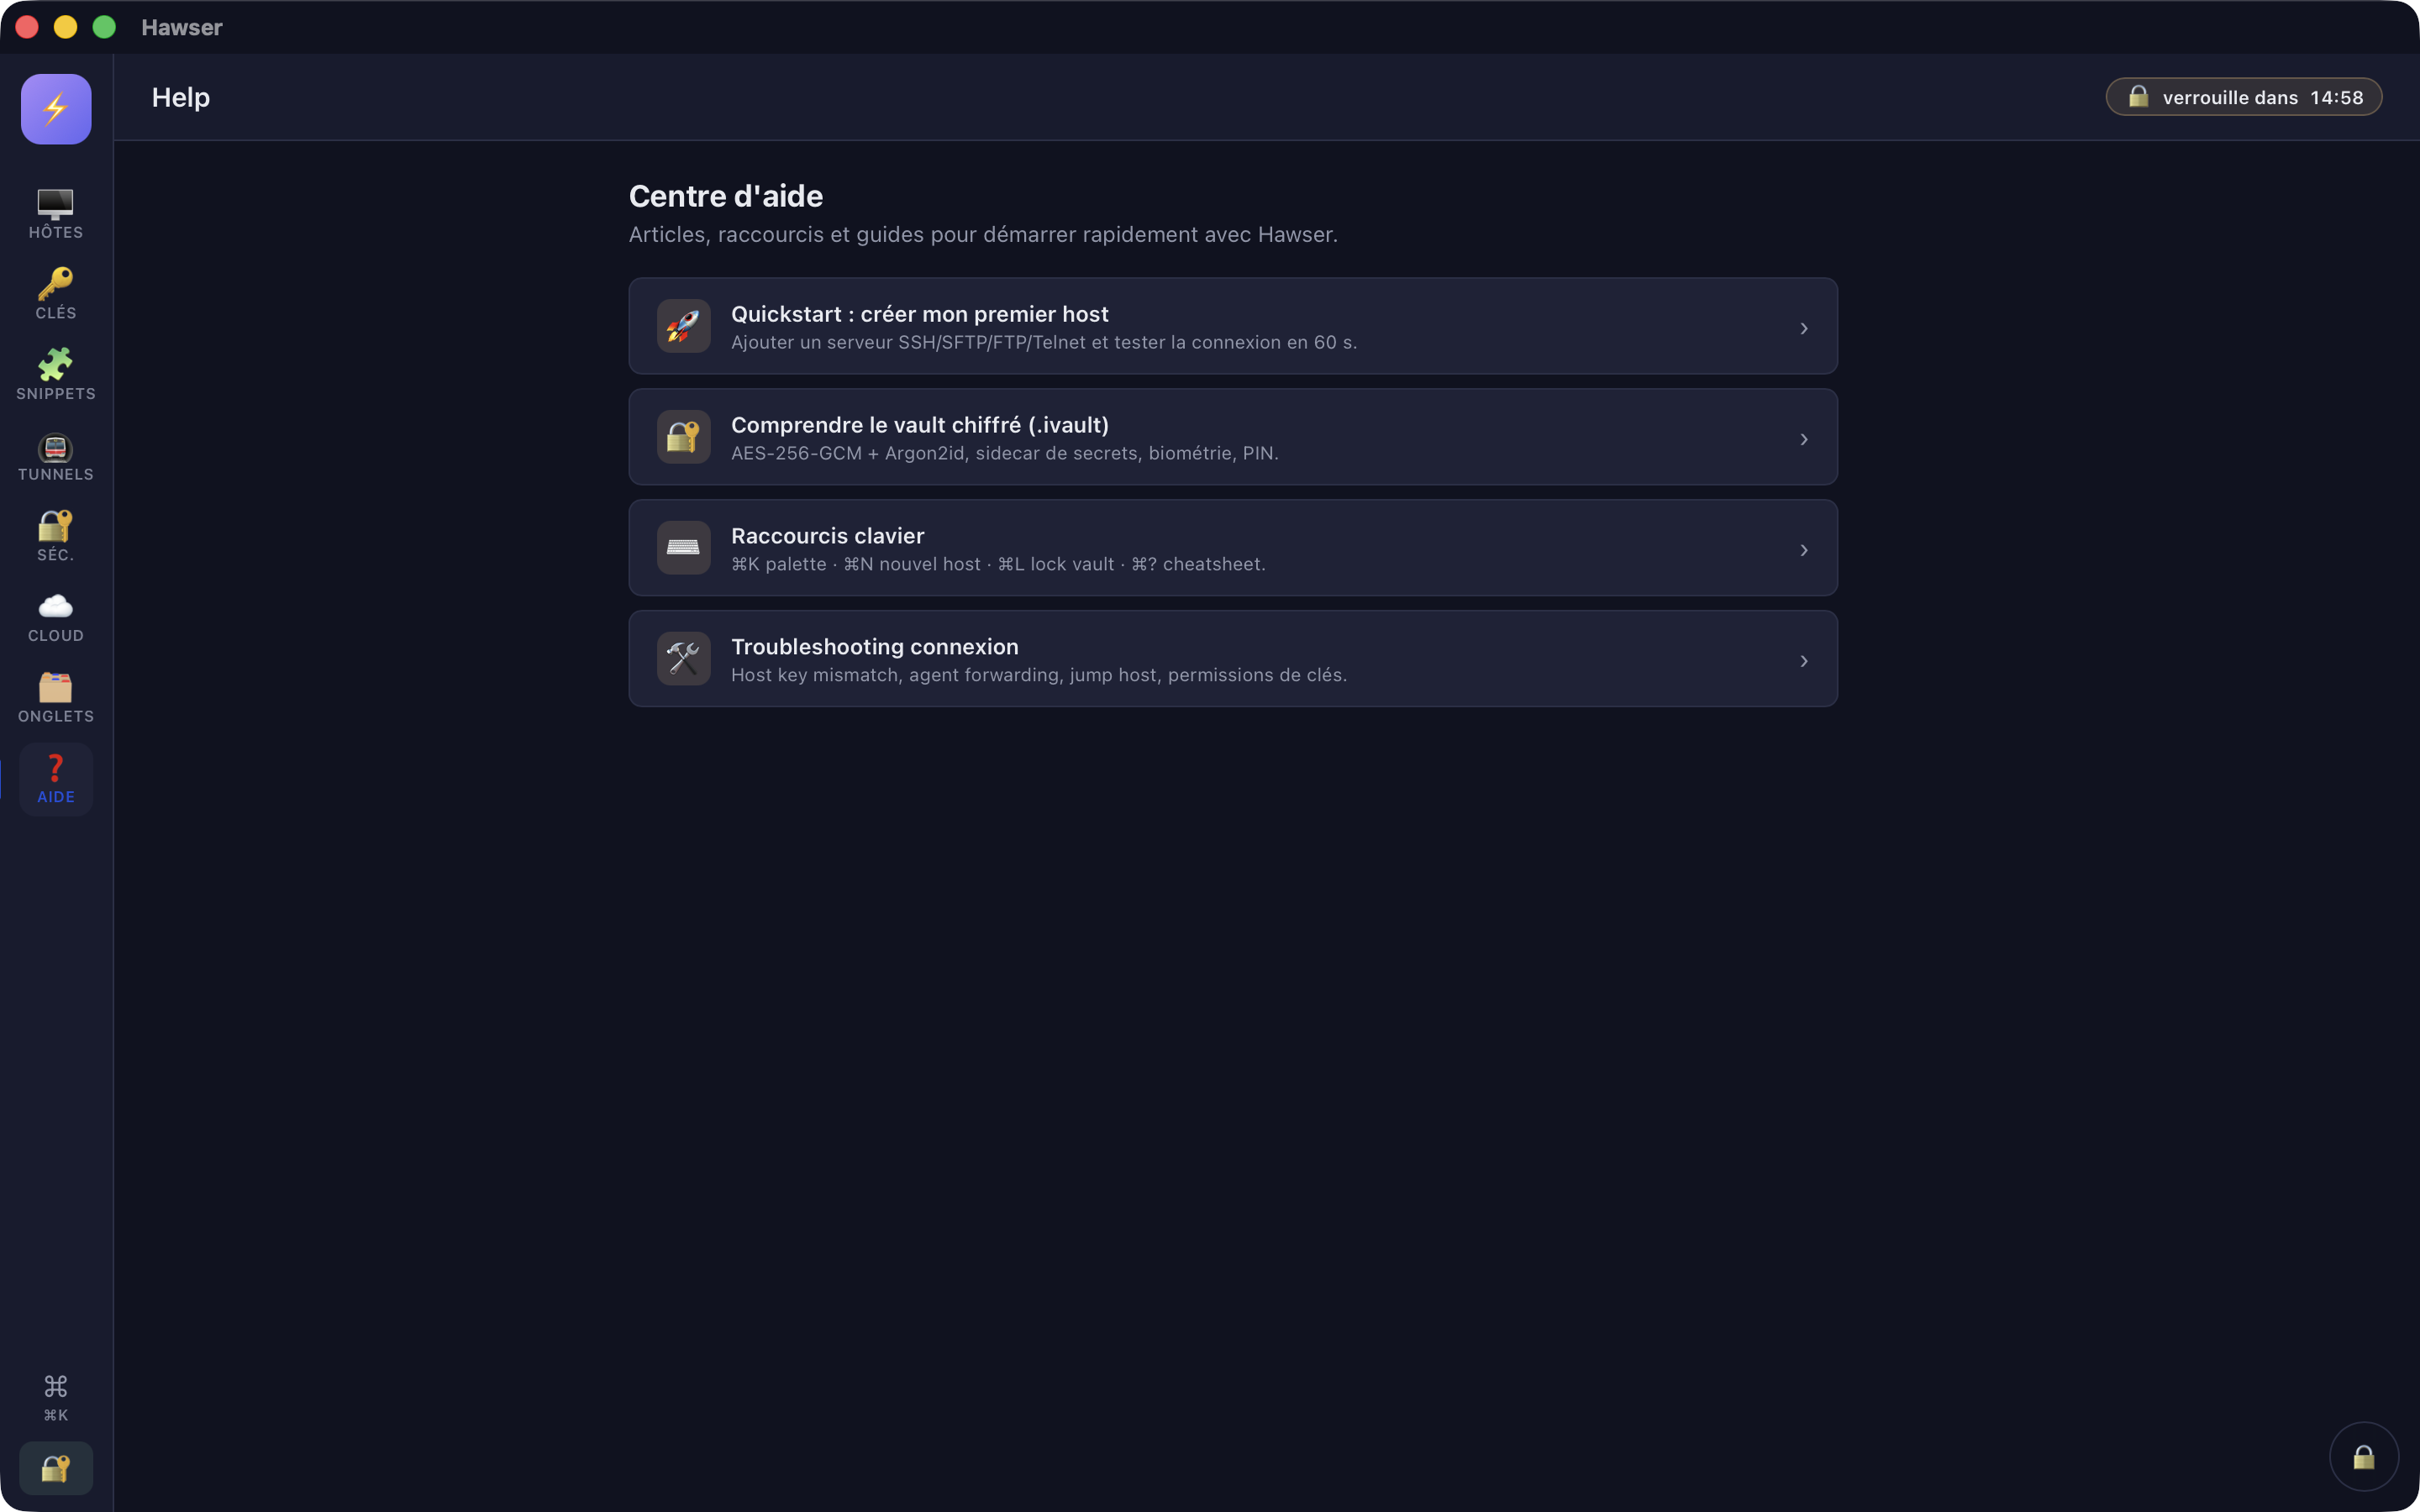
Every view opens with a three-sentence help box and a Read the guide link to the page that covers it. The cross collapses it to a small Help chip; the choice is remembered per view.
The Aide menu in the macOS menu bar offers the same entries: Manuel Hawser, Manuel en ligne… and Écrire au support…. The ⌘K palette also lists every page of the manual under AIDE.
What next?
Nothing works until a vault exists: hosts, SSH keys, snippets and tunnels all live inside one. The next move is therefore the Nouveau coffre card.
- Create your encrypted vault and choose a master password that satisfies Hawser's policy — Creating your vault.
- Save your first server — Adding a server.
- Open a session and check the server fingerprint — Opening an SSH session.
Where to go next: Organising your servers, Working in the terminal, Transferring files. And if something resists: Limitations and troubleshooting.