Managing your SSH keys
Import a key, validate it, attach it to a server — and know exactly what Hawser does not do for you.
Why a key rather than a password
A password can be guessed, gets reused from one server to the next, and has to be typed again at every connection. An SSH key is a pair: the public half is placed on the server, the private half never leaves your machine. The server issues a challenge, your machine signs it, and no reusable secret is ever transmitted.
- You can switch off password authentication on the server (
PasswordAuthentication no) and shut the door on brute-force attacks. - One key per purpose: revoking an access comes down to removing a single line from
~/.ssh/authorized_keyson the server concerned. - In Hawser, the key and its passphrase live in the encrypted vault, so there is nothing to retype at each session.
Hawser manages keys for the SSH and SFTP protocols. FTP and Telnet have no key authentication: they offer a password field and nothing more.
The SSH Keys view
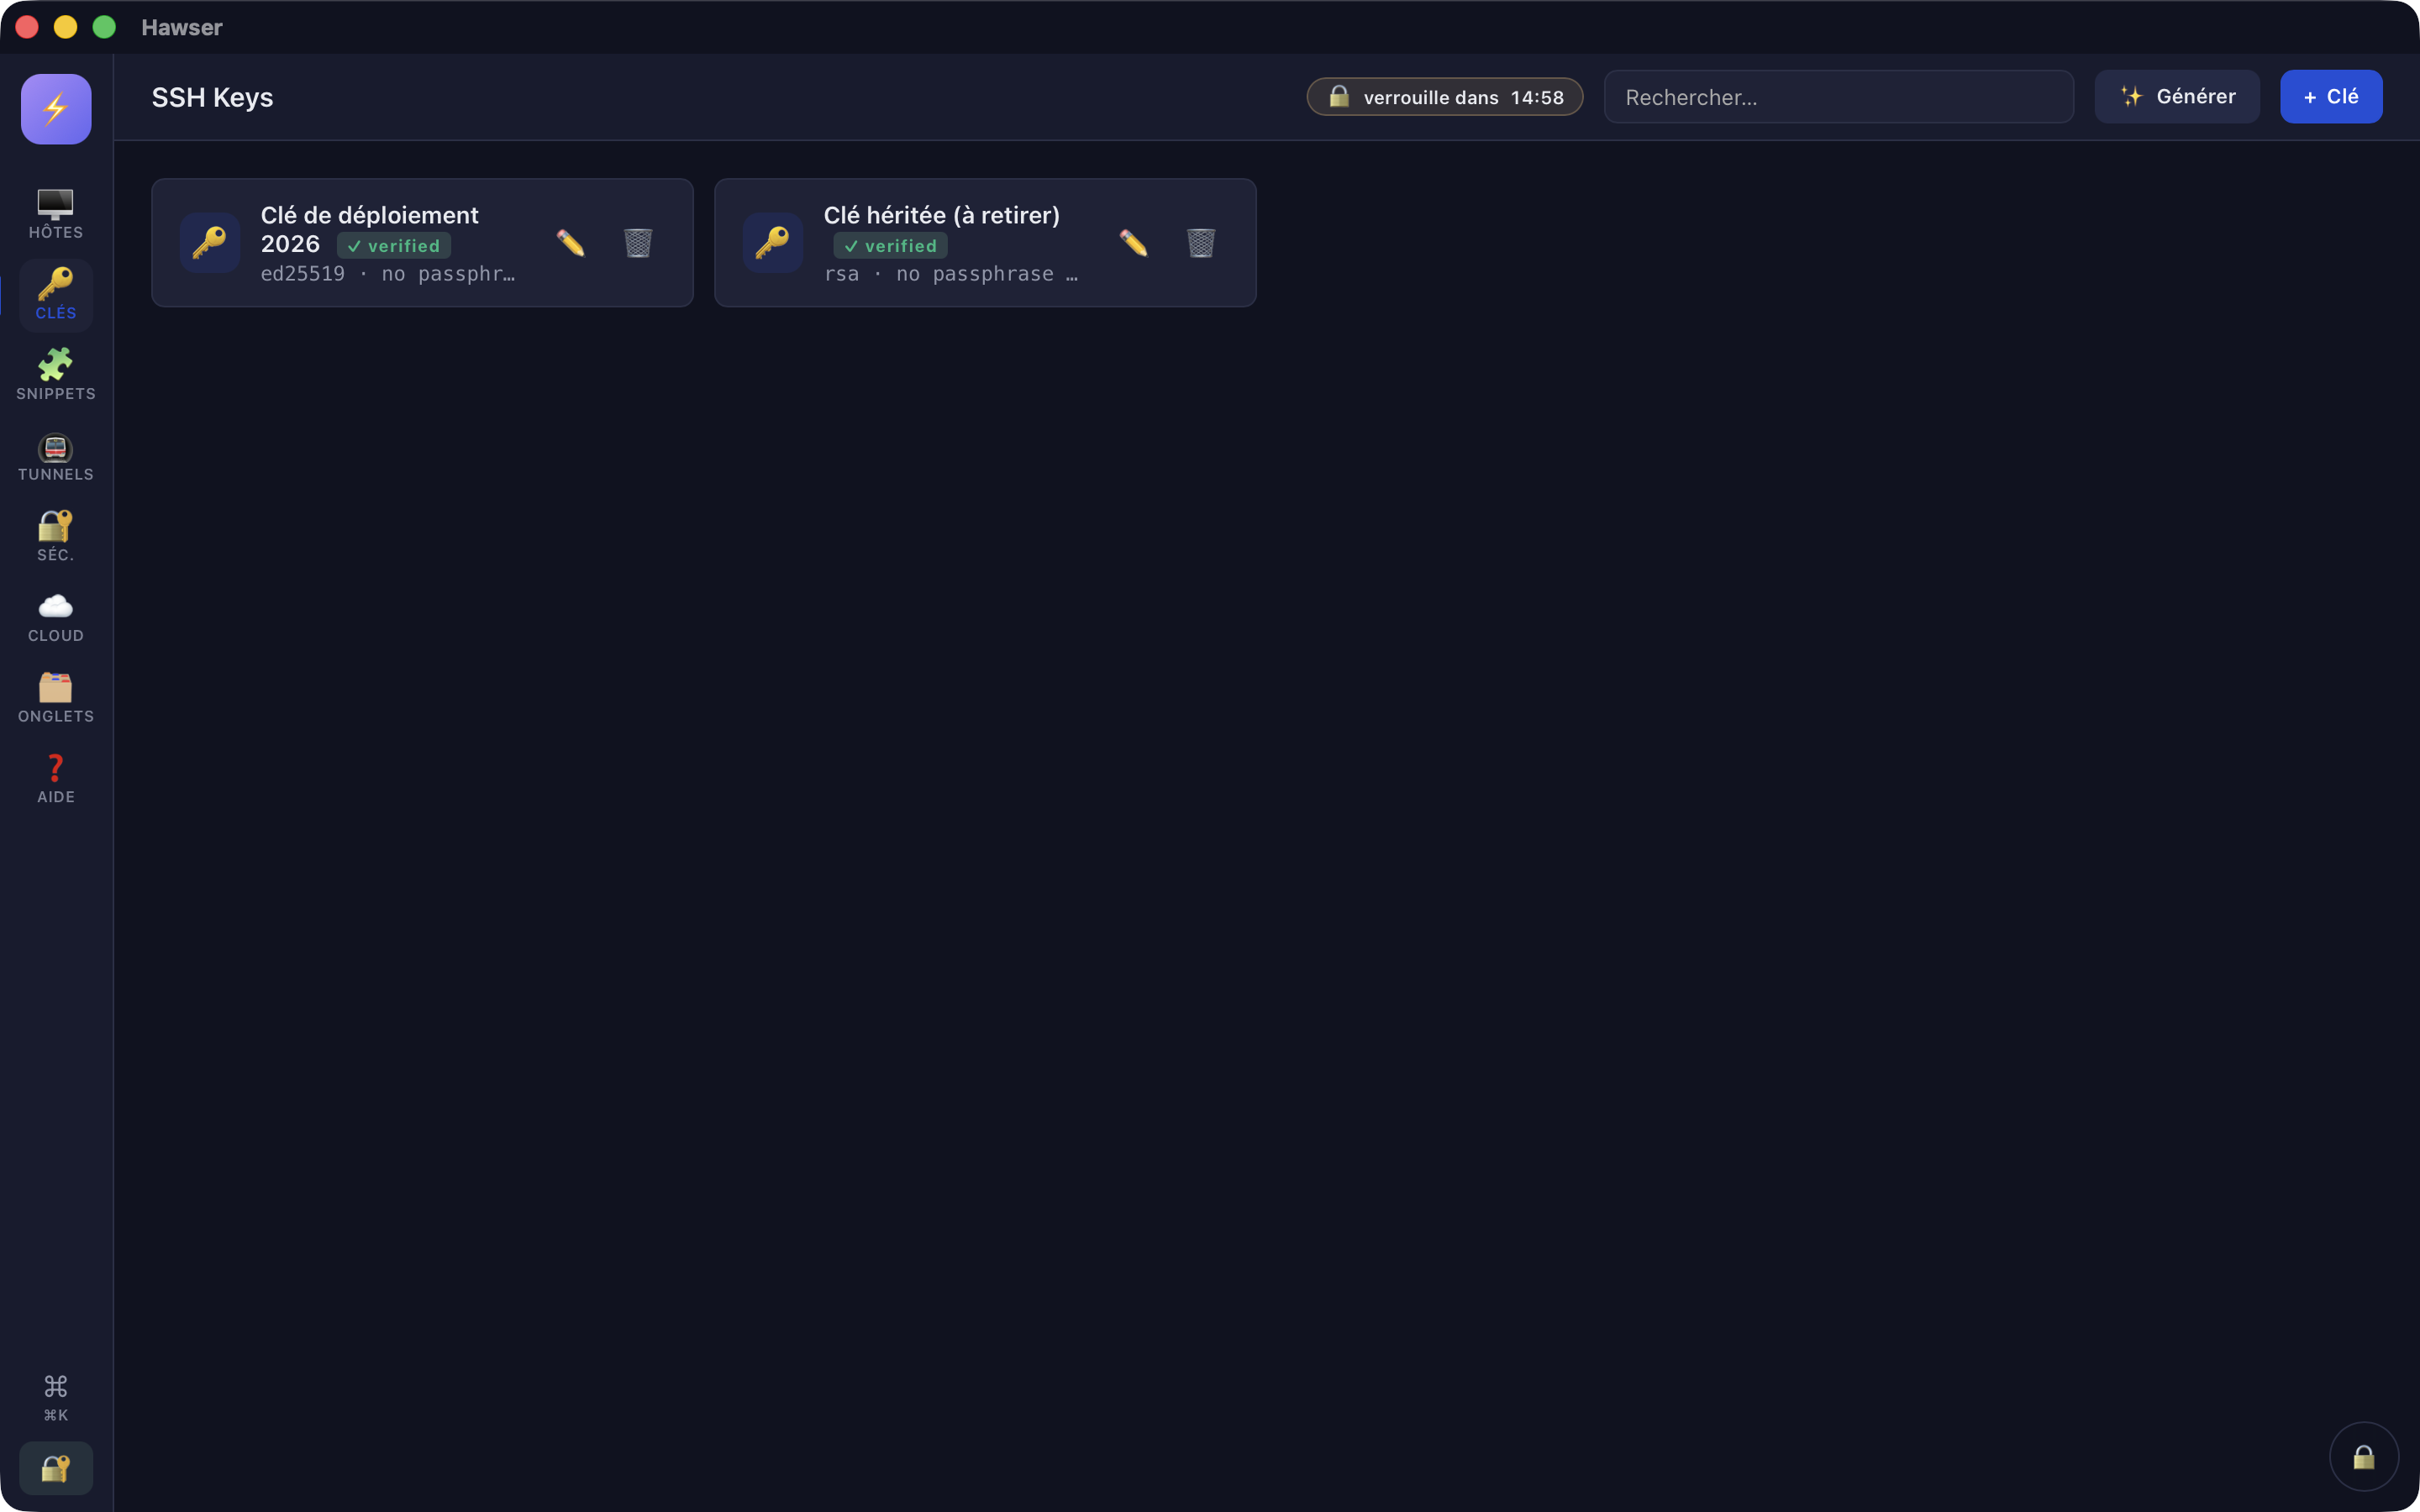
Left sidebar, the 🔑 "Clés" (Keys) icon. The view header reads "SSH Keys". No keyboard shortcut leads there directly; use ⌘K if you prefer the keyboard.
Each row shows the key name, a green "✓ verified" badge if it has been validated, then a metadata line of the form ssh-ed25519 · no passphrase · 2 uses. The usage counter is the number of connection entries pointing at that key — it is the only indicator you get before deleting. On the right: ✏️ to edit, 🗑️ to delete.
The search field in the top bar filters the list as you type, on the name only. Type, comment and fingerprint are all ignored. When the vault holds no key, the view shows "No SSH keys — Add a key to start using SSH/SFTP."
Generating a key pair
The "✨ Générer" (Generate) button sits in the top bar, to the left of "+ Clé" (Add key), and appears only on the Keys view of the native application. The "Générer une clé SSH" (Generate an SSH key) dialog offers exactly three algorithms.
| Option in the list | When to choose it |
|---|---|
| Ed25519 — recommandé | The default. A short, fast key, accepted by any server running OpenSSH 6.5 or later (2014). |
| RSA 4096 bits | An old server or a piece of network equipment that does not know Ed25519. Several seconds of computation. |
| RSA 2048 bits (legacy) | Only where an external constraint requires it. Avoid otherwise. |
The remaining fields are Nom (Name), Commentaire (Comment, optional), Passphrase (optional) and Confirmer la passphrase (Confirm passphrase). The comment is written into the key and repeated at the end of the public line — put something recognisable there, such as julien@mac-mini. If the two passphrase fields differ, generation does not start: "Les passphrases ne correspondent pas." Generation is entirely local; nothing travels over the network.
Generating a usable key in the meantime
ssh-keygen -t ed25519 -C "julien@mac-mini" -f ~/.ssh/prod_deployIn the macOS Terminal. The command writes ~/.ssh/prod_deploy (the private half) and ~/.ssh/prod_deploy.pub (the public half). Then import the private half into Hawser as described below.
Importing an existing key
- "Clés" view → blue "+ Clé" button, top right. The "New SSH key" dialog opens with the cursor in Name.
- Name the key. This is the name you will pick later in your connection entries.
- Paste the entire contents of the private key file into the "Clé privée (PEM)" (Private key, PEM) field, including the
-----BEGIN…and-----END…lines. - Enter the key passphrase, if it has one.
- Click "🧪 Validate". The dialog footer should show "✓ Clé ssh-ed25519" in green (or the actual type).
- Click "Save". A "Key added" toast confirms.
There is no file picker: importing is done by copy and paste. Going through the clipboard is safer than going through a text editor, which may re-encode the line endings.
pbcopy < ~/.ssh/prod_deployThe same dialog opens from ⌘K → "New SSH key", or from a connection entry, "Authentication" tab → "+ New" button. In that last case, the key you have just created is preselected in the entry's list.
"Save" always runs validation again, even if you have already clicked "🧪 Validate". Nothing is saved if it fails.
| Message | Cause and remedy |
|---|---|
| "✗ Clé vide" | The PEM field is empty. |
| "✗ Passphrase incorrecte (la clé refuse de se déchiffrer)." | The key is encrypted and the passphrase you entered does not open it. |
| "✗ parse: …" | The block cannot be decoded: a non-OpenSSH format, a truncated PEM, or line breaks that have been mangled. |
| "✗ Pas une clé OpenSSH (publique ou privée) reconnue." | The text you pasted is not a key at all. |
| "Name required" / "Key required" | One of the two fields was empty when you saved. |
| "Invalid key/passphrase" | Revalidation on save failed; nothing was written. |
Retrieving and deploying the public key
The server needs the public half. Hawser displays it nowhere and has no button to copy it; for an imported key, the vault entry does not even contain a public half. You have to derive it from the private file, outside the application.
ssh-keygen -y -f ~/.ssh/prod_deployThe command prints a single line: ssh-ed25519 AAAA… julien@mac-mini. That is the line that has to end up in ~/.ssh/authorized_keys on the remote account.
Attaching a key to a host
- Connections view → ✏️ on the host card (or "+ New" for a new entry).
- "Authentication" tab of the dialog.
- Switch the selector from "Password" to "Clé SSH" (SSH key).
- Pick the key from the "Saved SSH key" list. Validated keys appear there followed by a ✓.
- "Save". Then ⌨️ Shell or 📁 SFTP on the card to test.
Saving an entry in "Clé SSH" mode without having chosen a key is refused: "Select an SSH key".
Each entry carries its own key, jump hosts included: if the host goes through a bastion ("Advanced" tab → "Jump Host (bastion)"), the bastion authenticates with the key on its entry, and the target host with its own. The chain is limited to four levels ("jump host chain too deep (limit 4)").
| Error at connection | What it means |
|---|---|
| "[Erreur] Clé SSH introuvable (vérifie l'host : authType=key sans keyId valide)" | The entry is in key mode but the key it refers to no longer exists — typically because it has been deleted. |
| "[Erreur] decode private key: …" | The stored content is not a decodable private key: a public key pasted by mistake, or a truncated PEM. |
| "[Erreur] authentication failed" | The key is valid and the server refuses it: the public half is missing from authorized_keys, the file permissions are wrong, or the username on the entry is wrong. |
These messages appear in red in the terminal and as a notification. See also Opening an SSH session.
The macOS SSH agent
The Hawser engine can authenticate through the system SSH agent: it connects to the SSH_AUTH_SOCK socket, asks for the list of loaded identities and delegates the signing. That lets you keep your keys out of the vault.
The only workaround goes through JSON import: ⌘K → "Importer config OpenSSH (~/.ssh/config)" (Import OpenSSH config) → "Full JSON" tab.
{
  "configs": [
    {
      "id": "prod-01-agent",
      "protocol": "ssh",
      "name": "prod-01 (agent)",
      "host": "10.0.0.12",
      "port": 22,
      "username": "julien",
      "authType": "agent",
      "keyId": "",
      "initialPath": "."
    }
  ]
}
The objects are pushed into the vault exactly as they are, with no validation of their shape. Check your JSON before pasting: the engine falls back to agent mode whenever authType holds a value it does not recognise, which produces a silent attempt and an "authentication failed" you cannot make sense of. The agent's own errors are "SSH_AUTH_SOCK unavailable: …" (no agent answers) and "agent identities: …" (the agent refuses to list its identities). Start by checking ssh-add -l in the Terminal.
Where your keys live, and Touch ID
Hawser never writes to ~/.ssh. The PEM and its passphrase are filed in your encrypted .ivault file, and every key save triggers an immediate disk write — a failure is reported straight away as a notification. If the vault has locked in the meantime, the save fails with "no vault open": unlock and start again. See What is encrypted.
Before each write, an encrypted copy of the vault is placed in ~/Library/Application Support/ch.ilygo.hawser/vault-backups/. Your keys therefore exist in several copies on disk, always encrypted, never in clear text.
Touch ID does not protect keys one by one: it unlocks the vault. The master key is wrapped in the keychain and released after biometric authentication; once the vault is open, all your SSH keys can be used with no further prompt. There is no SSH signing by the Secure Enclave, and no hardware-backed key.
If the vault is paired with the cloud, adding a new key first checks the plan quota and may be blocked: "⚠ Quota cloud atteint" (cloud quota reached). Only a counter is sent to the server, never the content. See Synchronising your vaults.
Rename, replace, delete
The ✏️ button on a row opens the "Edit key" dialog, prefilled with the name and content of the key.
For a key with no passphrase, everything can be changed: you can rename it and replace the PEM. The key is fully revalidated on save, and a "Key updated" toast confirms.
Replacing a key (rotation)
There is no rotation feature. The operation is manual and the order matters: attach the new key everywhere before deleting the old one.
- Generate the new pair outside Hawser and place its public half in
~/.ssh/authorized_keyson each server concerned, alongside the old one. - Import the new private key into Hawser under a distinct name ("+ Clé").
- In each entry that used the old key: ✏️ → "Authentication" tab → select the new one under "Saved SSH key" → Save. The usage counter in the Keys view tells you how many entries are left to handle.
- Open a session on each server to confirm.
- Delete the old key in Hawser, then remove its line from
authorized_keyson the servers.
Deleting
The red 🗑️ button asks for confirmation — "Delete key", "Delete \"<name>\" ?" — then removes the key and rewrites the vault. A "Deleted \"<name>\"" toast confirms; if the write fails ("Delete failed"), the key is restored to the list.